
Coffee is delicious, but it can be hard to brew a great cup.
Even if you’re a coffee connoisseur, there’s always room for improvement in the brewing process. The problem with pour-over coffee is that there are so many variables involved – water temperature, grind size and consistency, amount of grounds used – that it’s easy for something to go wrong.
This guide will walk you through every step of how to brew pour-over coffee from start to finish, showing you how little changes like grinding your beans more finely or using fewer grounds can make all the difference in taste and quality. By following our tips and tricks on brewing pour-over coffee at home, you’ll be able to improve your skills as a barista while saving time and money by making better-tasting cups at home!
What You’ll Need
You will need a few items before starting the brewing process:
A Pour-Over Coffee Maker: There are a number of different coffee makers you can use to make pour-over coffee, the most common being the Chemex Glass Coffeemaker. To get started, you want to ensure you have a quality brewer that will do the job properly and fit your needs.
A gooseneck kettle: You will need to add hot water, and you’ll want it as hot as possible. You can use a stovetop kettle or an electric one. The precision of the pour is important for getting everything brewed properly, so a gooseneck kettle with variable temperature control will give you more control over the brewing process without having to spend too much.
Whatever you use, make sure there is a hook on it for hanging over the edge of your cup – this will allow easy access to controlling water levels in your cup while using one hand to pour and control the water level with precision.
Good coffee: You’ll also want to have high-quality coffee beans to enjoy through the brewing process. Use a good single-origin coffee that you enjoy to dial in your favorite flavor profile, or find something new to try out from one of the local roasters.

A Burr Grinder: If you want to get the most out of your beans, getting a grinder is essential. There are many grinders on the market today that will help you have control over how fine or coarse your grind is. A burr grinder will ensure a consistent texture to the grind – and since the consistency of your grounds is such an important part of brewing pour-over, this is essential for getting a great cup.
Filters: You also need filters for your coffee maker – paper or cloth. We recommend always using cloth if you want to get the most out of your coffee and avoid any paper taste.
Filtered Water: The quality of your water really makes a difference. The best option is to use filtered tap water, but if that’s not an option for you, bottled water is a decent substitute. If you can get your hands on some distilled or reverse osmosis water, it will be the best and most pure source of water to use.
A timer: Using a timer allows you to focus on getting the coffee into your cup resting before pouring in the water. This will help you to put less pressure on yourself and get the process down while still maintaining quality.
A scale: A scale is also useful to ensure you have the correct amount of grounds used while simultaneously formulating a recipe for your favorite brewed coffee.
A mug or carafe: You need something to pour over into and enjoy from. Most people use an insulated, heatproof vessel like a glass mug or stainless steel carafe so that they can enjoy their coffee on the go after it is brewed.
How To Brew Pour-Over Coffee: Step By Step Instructions
Start With the Right Ingredients
The most important part of brewing a great cup of pour-over coffee is using the right ingredients. When you have quality beans, fresh water, clean equipment, and a decent grinder to make your grind consistent – everything else will fall into place easily.
Grind Your Beans Consistently: The consistency of your grinds is essential for brewing a good cup of pour-over. The best way to ensure consistency is by grinding your beans at home before use – this will allow you to have complete control over the texture and size of your grinds without sacrificing too much freshness. A great grinder will help you achieve a consistent grind while allowing you to adjust it for different sized filters and grinds (coarser or finer).
Note: Grinding your beans too far in advance can dry them out, causing inconsistent results in taste. If you plan to grind more than a week or two ahead of time, store extra beans in an airtight container to keep
Start With Filtered Water: If you have the option, use filtered water to get started. Unfiltered tap water may contain chlorine or minerals which can wreak havoc on your coffee while brewing. You also want to start without boiling the water too much, as this will cause a loss of flavor in the beans while brewing. For filtered water, simply use your gooseneck kettle or electric kettle to control the flow of water and pour it into your cup (this is why having a handle on the kettle is helpful)
Heat Your Cup: Heat up your cup – this will help both with temperature for when you brew, but also will prevent the coffee from cooling off too quickly. When pouring water over coffee, you want to use a lower temperature than that which would be used for extracting with an espresso machine, as you are not trying to create pressure but instead just let the water flow over the coffee grounds – this will have a different effect on water viscosity vs. high pressure.

Step 1: Add your desired amount of coffee to the filter.
Step 2: Measure out the correct amount of water using your scale (for 1 cup, this will be 60g of coffee and 400g of water in your gooseneck kettle)
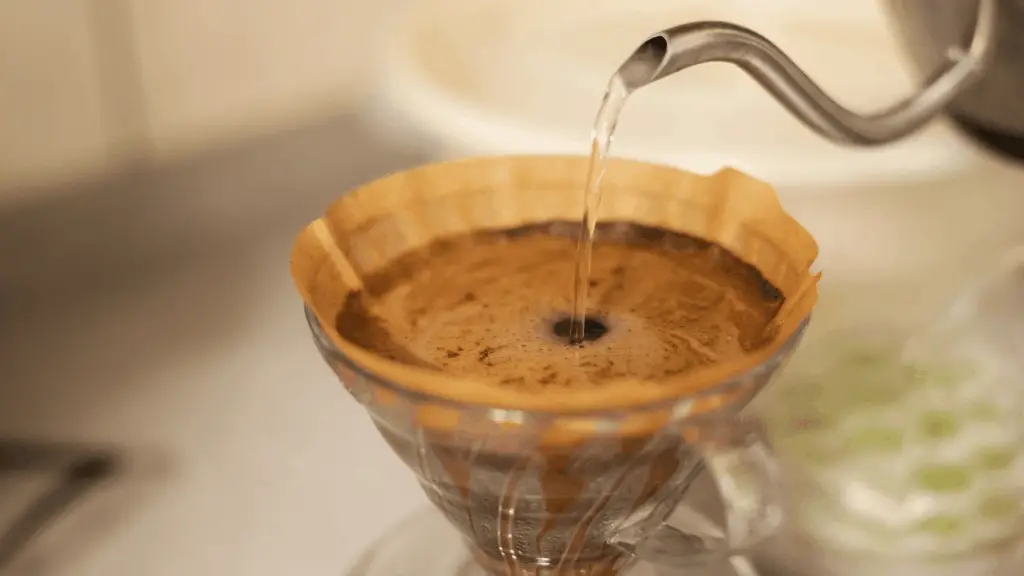
Step 3: Start with the kettle at a 45-degree angle over the coffee grounds – pour gently so that you don’t splash. You want to do this to wet the coffee and allow it to bloom, which will release gases from the coffee grounds.
The blooming process happens fast, but you will see the coffee grounds start to expand. This is normal and allows the carbon dioxide to escape from the beans which can affect taste if left behind in the water.
Step 4: Pour gently again, keeping your kettle at a 45-degree angle. You are aiming for a circle of coffee about 1 inch thick – this will make it easy to control the water flow as you continue pouring.
Step 5: Set your timer for 2 minutes (when pouring over, time is everything). At this stage, don’t worry about the speed of the pour or being too careful – instead focus on achieving an even circle of coffee and consistency in your brew process.
Step 6: After 2 minutes, stop pouring. The coffee in the center should still be a light shade of brown – if it is looking darker or you have any dry spots, add more water to compensate. In this step, we are also aiming for consistency by making sure that all of your grinds get wetted and extract evenly over time.
Step 7: Enjoy! Once you have brewed your coffee, be sure to enjoy it while it’s hot and fresh. This is one of the great things about pour-over – it keeps your coffee hotter longer than other brewing methods, which means you won’t have to drink that burnt leftover coffee in the office!
What is pour-over coffee?
Pour-over coffee has been embraced by the specialty coffee scene in recent years, but the technique has been commonly used in Europe since the 1900s and even longer in other places.
When brewing pour-over coffee, a filter is filled with coffee grounds (medium or coarse), and water is poured slowly onto the grounds to extract their flavor. This process happens at a lower temperature than you would use for an espresso machine, as we are not trying to create pressure but instead just let the water flow over the coffee grounds.
The brewing process is slow and meticulous, allowing you to have complete control over the water temperature and flow rate.
Why use the pour-over method?
Because there is no pressure like an espresso machine, it allows for more complexity of flavor in the final brew. Tons of variables can be adjusted during your pour-over coffee-making experience – grind size, humidity in the air, water temperature, slurry consistency, and brew time.
This means that you have full control over the flavor profile of your pour-over coffee.
What kind of coffee should you use to brew pour-over coffee?
Pour-over coffee can be brewed with any coffee you want. But to really get the most out of the end product, you should choose coffee that’s right for your pour-over brewing method.
Dark roast coffees are good for pour-over coffee, as they will be bolder and taste richer. Also, espresso roast beans work well with this brewing method because when their oils are extracted through the slow flow of water, the result is a very sweet coffee that tastes similar to an espresso.
However, you can also use medium or light roast varieties for this brewing method – in fact, some people prefer the more subtle flavors that they get from a light roast.
When choosing what kind of beans to use, we recommend looking toward those from Africa or Latin America. They will have more body and better flavor than some of the Asian varieties that are milder.
We suggest trying out different coffees and a great way to do so is with a coffee subscription, like Bean Box or Atlas Coffee Club.
What kind of grind is used?
Pour-over requires a medium or coarse grind size; it should be finer than that of drip coffee but not as fine as espresso.
What Is “The bloom”?
You often hear coffee aficionados refer to “the bloom” when talking about the pour-over method. The bloom is a step in the pour-over process where you briefly wet all of your coffee grounds with hot water. This releases gasses trapped in the coffee grounds and starts the extraction process. The bloom allows for greater flavor complexity and aroma in your finished cup of coffee.
Pulse Pouring vs Continuous Pouring
When it comes to the actual pouring process, there are two styles that you can do. The first is called pulse pouring, where you don’t add any water between the pulses – this will make a cup of coffee with more body and less brightness.
If you prefer lighter coffee with lots of flavor, continuous pouring is a better option. Continuous pouring can result in a cleaner, brighter-flavored coffee if you do it correctly. You should pour fairly slowly, and barely pour water in between pulses to achieve this effect.
Agitation
The grounds are often agitated during pour-over to mix the coffee and water together. One such method is called the “shake and stir”, where you shake your brewer gently back and forth while also stirring up the coffee at the same time.
This adds a bit more consistency to your brew, and it can help keep grounds from over-extracting in one area of the brewer.
FAQ
Do you have to use a Chemex for pour-over coffee?
Nope! You can use pour-over coffee makers that are made of glass like the Hario V60, or even metal mesh filters with your regular drip coffee maker.
Should I buy ground or whole coffee beans?
To get the most flavor out of your pour-over coffee, we suggest using whole beans and grinding them fresh before each cup.
Why do you “bloom” coffee?
As we mentioned earlier, blooming coffee allows you to get more flavor out of your final product. This is because it’s a step in the pour-over process that releases gasses in the coffee beans, which helps kickstart the extraction process.
Also, bloomed coffee won’t give off as much acidity or bitterness since all of those trapped gasses are released during the bloom.
Why is my coffee bitter?
When brewing pour-over, you may notice that with certain beans your cup of coffee comes out a bit on the bitter side. This has to do with how long you extract in your pour-over brewer; if you leave it on too long, bitterness can result. If this happens to you, try a slightly finer grind size or use less coffee grounds for your next brew.
Conclusion
We know that pour-over coffee is a complicated process but the finished product is totally worth it. We hope our guide took out the guesswork and provided you with all the information you need so you can make your own delicious cup of joe at home without any hassle.
Now it’s time for some brewing!
